Building a Hybrid Mobile Application with Adobe Phonegap


This blog has been a long time coming, as I've been working on the Cork Hounds iOS Mobile Application for the better part of 2017. I decided to use Phonegap for several reasons:
- Shortened learning curve using basic Javascript, CSS3, Html5 knowledge
- Reuse of existing website code and styling
- Flexibility of porting the application to iOS and Android devices
- Advertised simplicity of Phonegap/Cordova with Adobe Phonegap Build
Having just released the first (1.0) version of the Cork Hounds Mobile Application for Apple iOS devices, I can assert that it wasn't all that easy. There are lots of places to get stuck. I definitely do not have all the answers, but I want to share what I did learn. As you've undoubtedly figured out, this blog will focus on iOS, but I may later write a separate blog about my experience releasing the Android version.
Overview / Getting Started Lessons Learned
I want to take a moment to dispel some misconceptions that I had going into the project. When I first started, it was not clear how best to proceed -e.g. what software components (Adobe Phonegap Desktop vs Phonegap CLI, Application Loader vs XCode, Application Configurator vs iTunes, etc) to use, what to use them for (specific use cases), and what web resources were right/current. There is a lot of old/misinformation on the net. Over the course of this project, I developed some opinions. There are many different ways to approach this task; I'll share my thoughts/recommendations and lessons learned. But I am definitely still a newbie in this area.
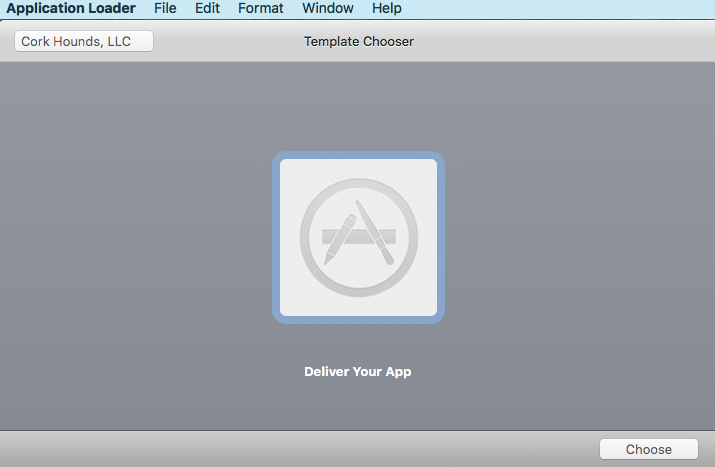
First, I had hoped I could do all the development on my PC since I had chosen to use Adobe Phonegap Build. Some folks are successful doing this with other online tools for AppIcon generation, and other workarounds (macincloud.com) for using XCode, etc. Bottom line, you still need XCode for certain tasks. For example, you must use either Application Loader or XCode to submit your application to the App Store. In addition, it is easiest to use XCode to get high resolution screenshots of your Application for your App Store submission. Finally, Cordova's dependencies relay much of this on their iOS Platform Guide. So, you will need physical or virtual access to an Apple computer.
Second, Adobe provides an ecosystem of developer tools for the PC and Mac, as well as iOS, Android and Windows mobile devices, to include the Phonegap Desktop Application, and the associated Phonegap Developer Application. These are often used in conjunction with Weinre. These tools offer a convenient way to deploy/test an application on an iOS device. However, it does so within the Phonegap iOS Application. This is fine for simple use cases using Weinre to get access to Application logs. However, when you need access to device logs, you need to use XCode, and at that point, it's easier/better to use Safari for application inspection/debugging/console logs. And I believe that it is important to start testing your application independently, "in the wild" as quickly as possible ... which means directly on an iOS device to see how it performs in real-world conditions. For these reasons, I suggest you stick with the Phonegap command line tool (CLI) if possible.
Third, Adobe Phonegap wraps Apache Cordova, and provides some added tooling/features -e.g. interoperability with the Phonegap Developer Application and Phonegap Build. It will execute cordova CLI commands, and precludes you from having to install the Cordova CLI separately. When I started, I thought the phonegap CLI would be a huge benefit. However, when I abandoned the Desktop and Developer apps, and started using Safari and XCode, I realized I was more reliant on the Cordova provided commands within the Phonegap CLI.
Fourth, it is important to know the config.xml specification and folder structure for the project when using Phonegap Build. These are directly influenced by the Apache Cordova project, and are a good example of where Phonegap is tightly coupled to its companion open source project in order to keep things compatible. The config.xml specification will also impact the folder structure, but more on that later. When using Phonegap Build, you're only submitting the bare necessities such as the /www and /res folders with the config.xml ... not any of the browser, iOS, Android or Windows project data. This is to say that unless you intend to use XCode to build and submit your iOS application, you don't want to waste time solving problems or configuring your application's settings/assets/etc in XCode. Instead, your focus should be on the config.xml file and the folder structure.
Finally, Phonegap Build was helpful to me, a beginner to iOS application builds, because it minimized some of the learning curve with XCode. XCode is not that intuitive, but it is relatively simple to figure out how to simulate and debug an application. Phonegap Build works via Configuration (and seemingly a little Convention). Decisions are made for you, and you only have the config.xml and folder structure to influence the way Phonegap Build behaves. More than a few times I found myself unzipping the resulting IPA bundle that I downloaded from Phonegap Build to interpret/debug the cryptic errors I received when uploading my App to the App Store using Application Loader in an attempt to figure out why certain icons were missing, etc. Alternatively, you can use XCode directly to build your iOS application; however, with that freedom comes greater complexity.
Setup
The primary websites that I used most heavily throughout this project are
- Apple Developer - This is where you must register as an Apple Developer for access to generate Certificates and Provisioning Profiles, and access iTunesConnect for managing your builds for test and submission.
- Apple Id Management - The Application Loader requires that you generate an App-Specific Password for authenticating.
- Adobe Phonegap Build - Adobe's cloud service for assembling applications into an IPA bundle, which you upload to Apple.
- Apache Cordova's Latest Documentation - This is definitely the most important site for developer information when using Phonegap or straight Cordova.
- Adobe Phonegap Software - This is where you can download the CLI, and other tools from Adobe.
- Adobe Phonegap's Latest Documentation - In particular the 'References' and 'Phonegap Build' areas have useful information.
- Cordova's Issues/Bugs How-To and JIRA- If you run into an issue, searching the net will often yield the answer. But it is also helpful to create an account to Cordova JIRA issue tracking site.
- Apple Developer Help - Apple offers several tools (forums, etc) for getting help.
To get started, you will want to register with Apple as a Developer. You can do this as an Individual or an Organization. There is plenty of information about the registration process on the net. If you're registering as an organization, you will need to have (or find via the Apple workflow) your <a href=http://www.dnb.com/duns-number/what-is-duns.html">D-U-N-S Number, which is a unique nine digit identification number for each physical location of your business. Dun & Bradstreet (D&B) provides the D-U-N-S Number, along with other related services.
Once registered, you will want to create your developer and distribution certificate(s). This is all done via the "Certificates, Identifiers, & Profiles" section from the main Developer Account screen. These are used for app signing for testing on local devices and publication to the App Store for broader distribution. If you have a test iPhone/iPad, you will want to register those devices on this site, as they will be referenced by your development provisioning profile.
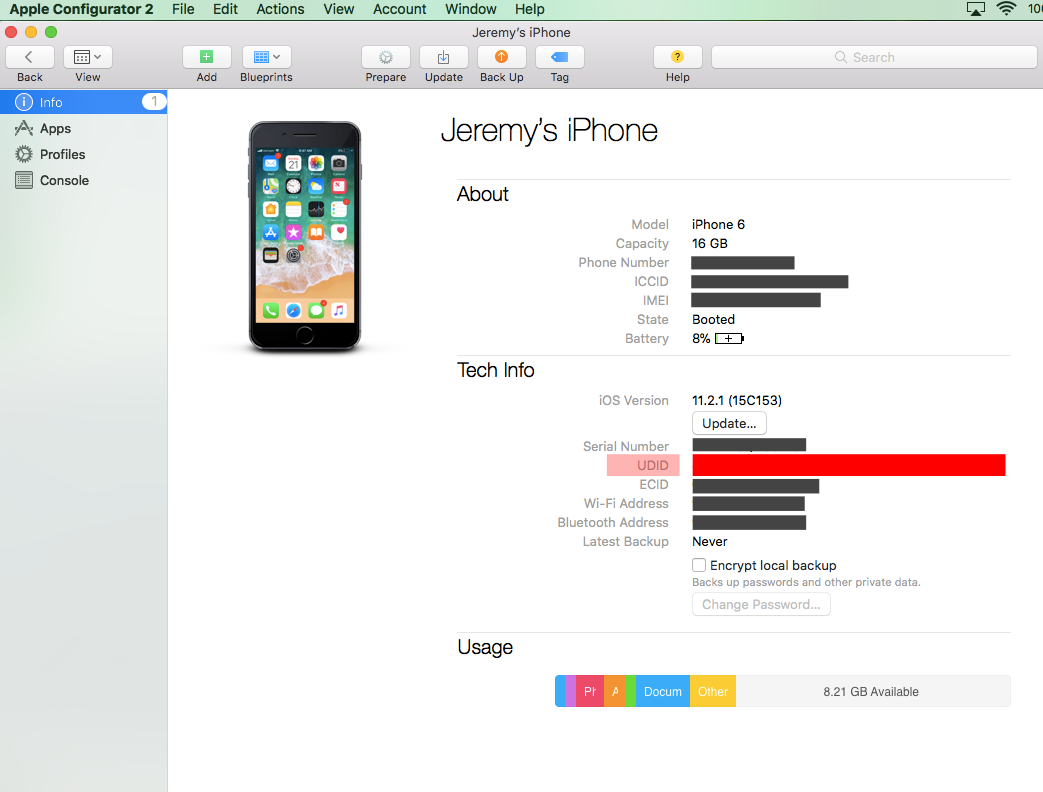
You will need to create a development provisioning profile for each physical device you want to test with. To do that, you will add a Device in the "Certificates, Identifiers, & Profiles" section. For the device, you will need a UDID ... a unique device identifier from the physical phone you intend to use. You can get this using Apple Configurator. Simply connect your device to an Apple Computer, and open Configurator. When the device appears in the center of Configurator's main window, double click it, and you'll see the screen below, with the UDID (which I've highlighted in red).
Also, as part of that process you will also identify what Device Services you will use with your Apple ID, which will be included in your provisioning profile. The site also provides instructions for creating the development/distribution certificates, which require a Mac but it is possible to create these certificates using a PC ... just search the net and there are plenty of examples/blogs.
If you are using Phonegap Build, you will need to add one or more signing keys to the iOS portion of your Build project by uploading the .p12 certificate and provisioning profile. There's a good tutorial on this here. If you use XCode for doing local builds for Simulated or physical Devices, you will need to configure your Signing profile within XCode. XCode should pick these up automatically when you connect XCode w/ your Developer Account.
Here is a list of the software/versions that I am using for the purpose of this exercise/blog.
- Phonegap CLI 7.1.0 - For parity, I use the same CLI version as the latest CLI available via Phonegap Build. If you intend to use Adobe Phonegap Build, I highly recommend you use the latest CLI version that it supports to get the latest fixes. This matters most when fixing issues discovered during submission to Apple iTunesConnect via the Application Loader, and support for fixes to Beta App Review or Submission Review rejections.
- XCode 9.2 - For local builds, using iOS Simulated and/or real Device(s) to quickly test changes/plugins and see the Device Console.
- Application Loader 3.7 - For submitting IPA application bundles to TestFlight / Apple iTunes Connect.
- Application Configurator 2.6.1 - For deploying Phonegap Build IPA application bundles onto a local iOS device.
- The TestFlight 2.0 app for Apple iOS Devices - For downloading, installing and testing an iOS Application that is in TestFlight / Apple iTunes Connect. This is for iTunes Connect users and all your remote test users (up to 10,000).
- A Browser - I used Safari (for instrumenting the application) when testing on a connected Device, and Chrome in my day to day web testing. I particularly like Chrome's Developer Tools and their 'Toggle device toolbar', which lets you simulate common device screen sizes.
- iPhone with iOS 11.2.1
Lastly, I am using the Eclipse IDE to write the Javascript, HTML and CSS for my application, but that isn't the focus of this blog.
I am going to assume that you installed these tools, and not get into installation instructions as there are plenty of web resources available for that.
Creating your project
To get up and running with a basic project, you can either create the project by hand, or use the Phonegap CLI to create a starter project, or start with a template.
The starter project is great for providing a starting point, but know that you will likely want to make changes. For instance, the template includes common plugins like the cordova-plugin-camera and cordova-plugin-media-capture* plugins, but it does not add the necessary usage description into the config.xml to meet Apple's Device Data Privacy Requirements. Therefore, you will get an error when trying to submit the IPA bundle via Application Loader. If you don't intend to use the camera, you will want to remove these plugins. Otherwise, add the necessary elements to the config.xml. More on this in Development and Configuration and Troubleshooting.
Development and Configuration
First, lets look at a basic, working config.xml example. Then we'll look at the matching folder structure. This example was based on information from the latest Cordova documentation and Phonegap documentation.
The first segment below opens the config.xml file with an element identifying the XML version and encoding. This is followed by the widget element where our namespace and app version are defined. The first three sub-elements to widget are name, description and author.
<?xml version='1.0' encoding='utf-8'?>
<widget id="com.YOUR.NAMESPACE" version="1.0.0" xmlns="http://www.w3.org/ns/widgets" xmlns:gap="http://phonegap.com/ns/1.0">
  <name>YOUR APP NAME</name>
  <description>
    YOUR APP DESCRIPTION
  </description>
  <author email="YOUR EMAIL ADDRESS" href="YOUR WEB ADDRESS">YOUR ORGANIZATION NAME
  </author>
Next up are the preferences. DisallowOverscroll is defined in the Cordova iOS Preferences documentation. I also use the cordova-plugin-splashscreen, which as you might imagine provides a splashscreen for the application. Lastly, the phonegap-version, is a Phonegap Build preference for setting the build CLI version.
  <preference name="DisallowOverscroll" value="true" />
  <preference name="AutoHideSplashScreen" value="true" />
  <preference name="FadeSplashScreenDuration" value="300"/>
  <preference name="SplashScreenDelay" value="3000" />
  <preference name="ShowSplashScreenSpinner" value="false"/>
  <preference name="phonegap-version"    value="cli-7.1.0" />
Now we have the list of plugins. These are provided by the default starter project, and are well defined on in the latest Cordova documentation, found on the bottom left of the navigation panel.
  <plugin name="cordova-plugin-battery-status" source="npm" spec="~1.2.4" />
  <plugin name="cordova-plugin-device" source="npm" spec="~1.1.6" />
  <plugin name="cordova-plugin-dialogs" source="npm" spec="~1.3.3" />
  <plugin name="cordova-plugin-file" source="npm" spec="~4.3.3" />
  <plugin name="cordova-plugin-geolocation" source="npm" spec="~2.4.3" />
  <plugin name="cordova-plugin-globalization" source="npm" spec="~1.0.7" />
  <plugin name="cordova-plugin-inappbrowser" source="npm" spec="~1.7.1" />
  <plugin name="cordova-plugin-network-information" source="npm" spec="~1.3.3" />
  <plugin name="cordova-plugin-vibration" source="npm" spec="~2.1.5" />
  <plugin name="cordova-plugin-splashscreen" spec="~4.1.0" />
You may need others, though. Node Package Manager (NPM) is a great place to look for these (obviously). And as you work with plugins, you will want to keep them up to date. I discovered a great module published to NPM for updating plugins.
In order to use any user data, you must provide a usage description. Apple provides a list of all the interfaces requiring permission and usage descriptions. In our case, we are using the geolocation plugin, and my code asks for the location. Therefore, we must provide a usage description when we ask for permission using an edit-config.
  <edit-config target="NSLocationWhenInUseUsageDescription" file="*-Info.plist" mode="merge">
    <string>YOUR DESCRIPTION</string>
  </edit-config>
Apple is very picky when it comes to having all the required icons in your IPA bundle. I have also found that Phonegap Build expects these icons in specific locations, based on their interpretation of the Cordova icon documentation. Cordova bases its decisions on Apple's icon requirements. Take note that icons should be 24 bit PNG files, and cannot contain any transparent regions.
First up, we must provide a general purpose 57x57 pixel icon that can be used for all platforms. I have found this must be explicitly provided in the res/ folder, and named icon.png. More on this in Troubleshooting.
<icon src="res/icon.png" />
You can provide icons and splash screens for all platforms. Based on the current Cordova 7.x specification, it is recommended to wrap all the icon references in a platform tag. Notice the larger @2x and @3x icons for the Retina displays. For example, the icon-40.png is 40x40 pixels, while its @2x is 80x80 pixels for higher quality displays.
  <platform name="ios">
	  <icon height="57" src="res/ios/icon-57.png" width="57" />
	  <icon height="114" src="res/ios/icon@2x.png" width="114" />
	  <icon height="40" src="res/ios/icon-40.png" width="40" />
	  <icon height="80" src="res/ios/icon-40@2x.png" width="80" />
	  <icon height="50" src="res/ios/icon-50.png" width="50" />
	  <icon height="100" src="res/ios/icon-50@2x.png" width="100" />
	  <icon height="60" src="res/ios/icon-60.png" width="60" />
	  <icon height="120" src="res/ios/icon-60@2x.png" width="120" />
	  <icon height="180" src="res/ios/icon-60@3x.png" width="180" />
	  <icon height="72" src="res/ios/icon-72.png" width="72" />
	  <icon height="144" src="res/ios/icon-72@2x.png" width="144" />
	  <icon height="76" src="res/ios/icon-76.png" width="76" />
	  <icon height="152" src="res/ios/icon-76@2x.png" width="152" />
      <icon height="167" src="res/ios/icon-83.5@2x.png" width="167" />
	  <icon height="29" src="res/ios/icon-small.png" width="29" />
	  <icon height="58" src="res/ios/icon-small@2x.png" width="58" />
	  <icon height="87" src="res/ios/icon-small@3x.png" width="87" />
	  <icon height="1024" src="res/ios/icon-1024.png" width="1024" />
The icons in the xml snippet above are all standard, except one. Apple has just started requiring that you provide a 1024x1024 pixel icon for the App Store via your IPA bundle, or by uploading one through iTunesConnect. More in Troubleshooting.
**Update July 2018: ** I had to add a new icon with 167x167 pixel dimensions to my package today in order to push it via Application Loader. The name should be "icon-83.5@2x.png". Notice I included it in the list above.
The same rules for icons apply to splash screens.
	  <splash height="1136" src="res/ios/Default-568h@2x~iphone.png" width="640" />
	  <splash height="1334" src="res/ios/Default-667h.png" width="750" />
	  <splash height="2208" src="res/ios/Default-736h.png" width="1242" />
	  <splash height="1242" src="res/ios/Default-Landscape-736h.png" width="2208" />
	  <splash height="1536" src="res/ios/Default-Landscape@2x~ipad.png" width="2048" />
	  <splash height="768" src="res/ios/Default-Landscape~ipad.png" width="1024" />
	  <splash height="2048" src="res/ios/Default-Portrait@2x~ipad.png" width="1536" />
	  <splash height="1024" src="res/ios/Default-Portrait~ipad.png" width="768" />
	  <splash height="960" src="res/ios/Default@2x~iphone.png" width="640" />
	  <splash height="480" src="res/ios/Default~iphone.png" width="320" />
  </platform>
**Update July 2018: ** I updated my application to support for iPhone X. There is a good tutorial for this on Medium by Matt Netkow. Through this story, I discovered a convenient way to use a Storyboard (instead of Splash screens), which are required for iPhone X. Kerri Shotts wrote a great blog about storyboards on Medium, and she also wrote a simulator so that you could test your Storyboard to see how it looks.
Lastly, the starter project includes the following permissions for links and cross site scripting requests by default. You may want to tighten these permissions up for security reasons.
  <access origin="*" />
  <allow-intent href="http://*/*" />
  <allow-intent href="https://*/*" />
  <allow-intent href="tel:*" />
  <allow-intent href="sms:*" />
  <allow-intent href="mailto:*" />
  <allow-intent href="geo:*" />
  <platform name="ios">
    <allow-intent href="itms:*" />
    <allow-intent href="itms-apps:*" />
  </platform>
</widget>
**Update July 2018: ** In summary, and for completeness, I'm posting the entire config.xml here for reference.
<?xml version='1.0' encoding='utf-8'?>
<widget id="com.YOUR.NAMESPACE" version="1.0.0" xmlns="http://www.w3.org/ns/widgets" xmlns:gap="http://phonegap.com/ns/1.0">
  <name>YOUR APP NAME</name>
  <description>
    YOUR APP DESCRIPTION
  </description>
  <author email="YOUR EMAIL ADDRESS" href="YOUR WEB ADDRESS">YOUR ORGANIZATION NAME
  </author>
  <preference name="DisallowOverscroll" value="true" />
  <preference name="AutoHideSplashScreen" value="true" />
  <preference name="FadeSplashScreenDuration" value="300"/>
  <preference name="SplashScreenDelay" value="3000" />
  <preference name="ShowSplashScreenSpinner" value="false"/>
  <preference name="phonegap-version"    value="cli-7.1.0" />
  <plugin name="cordova-plugin-battery-status" source="npm" spec="~1.2.4" />
  <plugin name="cordova-plugin-device" source="npm" spec="~1.1.6" />
  <plugin name="cordova-plugin-dialogs" source="npm" spec="~1.3.3" />
  <plugin name="cordova-plugin-file" source="npm" spec="~4.3.3" />
  <plugin name="cordova-plugin-geolocation" source="npm" spec="~2.4.3" />
  <plugin name="cordova-plugin-globalization" source="npm" spec="~1.0.7" />
  <plugin name="cordova-plugin-inappbrowser" source="npm" spec="~1.7.1" />
  <plugin name="cordova-plugin-network-information" source="npm" spec="~1.3.3" />
  <plugin name="cordova-plugin-vibration" source="npm" spec="~2.1.5" />
  <plugin name="cordova-plugin-splashscreen" spec="~4.1.0" />
  <edit-config target="NSLocationWhenInUseUsageDescription" file="*-Info.plist" mode="merge">
    <string>YOUR DESCRIPTION</string>
  </edit-config>
  <icon src="res/icon.png" />
  <platform name="ios">
	  <icon height="57" src="res/ios/icon-57.png" width="57" />
	  <icon height="114" src="res/ios/icon@2x.png" width="114" />
	  <icon height="40" src="res/ios/icon-40.png" width="40" />
	  <icon height="80" src="res/ios/icon-40@2x.png" width="80" />
	  <icon height="50" src="res/ios/icon-50.png" width="50" />
	  <icon height="100" src="res/ios/icon-50@2x.png" width="100" />
	  <icon height="60" src="res/ios/icon-60.png" width="60" />
	  <icon height="120" src="res/ios/icon-60@2x.png" width="120" />
	  <icon height="180" src="res/ios/icon-60@3x.png" width="180" />
	  <icon height="72" src="res/ios/icon-72.png" width="72" />
	  <icon height="144" src="res/ios/icon-72@2x.png" width="144" />
	  <icon height="76" src="res/ios/icon-76.png" width="76" />
	  <icon height="152" src="res/ios/icon-76@2x.png" width="152" />
      <icon height="167" src="res/ios/icon-83.5@2x.png" width="167" />
	  <icon height="29" src="res/ios/icon-small.png" width="29" />
	  <icon height="58" src="res/ios/icon-small@2x.png" width="58" />
	  <icon height="87" src="res/ios/icon-small@3x.png" width="87" />
	  <icon height="1024" src="res/ios/icon-1024.png" width="1024" />
	  <splash height="1136" src="res/ios/Default-568h@2x~iphone.png" width="640" />
	  <splash height="1334" src="res/ios/Default-667h.png" width="750" />
	  <splash height="2208" src="res/ios/Default-736h.png" width="1242" />
	  <splash height="1242" src="res/ios/Default-Landscape-736h.png" width="2208" />
	  <splash height="1536" src="res/ios/Default-Landscape@2x~ipad.png" width="2048" />
	  <splash height="768" src="res/ios/Default-Landscape~ipad.png" width="1024" />
	  <splash height="2048" src="res/ios/Default-Portrait@2x~ipad.png" width="1536" />
	  <splash height="1024" src="res/ios/Default-Portrait~ipad.png" width="768" />
	  <splash height="960" src="res/ios/Default@2x~iphone.png" width="640" />
	  <splash height="480" src="res/ios/Default~iphone.png" width="320" />
  </platform>
  <access origin="*" />
  <allow-intent href="http://*/*" />
  <allow-intent href="https://*/*" />
  <allow-intent href="tel:*" />
  <allow-intent href="sms:*" />
  <allow-intent href="mailto:*" />
  <allow-intent href="geo:*" />
  <platform name="ios">
    <allow-intent href="itms:*" />
    <allow-intent href="itms-apps:*" />
  </platform>
</widget>
Folder Structure
The resulting folder structure appears below. The folders in the www/ are yours to name as you please. If you are using Phonegap Build, this is all that you need. You can either zip this up, and upload via the website, or submit via the Phonegap CLI.
Project Root
+-- config.xml
+-- www/
|   +-- index.html
|   +-- scripts/
|   +-- images/
|   +-- styles/
+-- res/
|   +-- ios/ (all other icons and splash screens)
|   +-- icon.png
Workflows / Use Cases
As I coded/tested my application, I fell into a rhythm, or workflow. Not sure if this is useful to anyone else, but in the spirit of 'sharing what worked for me', here it is. Otherwise, jump ahead to the Troubleshooting section.
As I coded my Hybrid App in Eclipse, and I was ready to test basic web functionality (but not Phonegap/Cordova plugins), I would pull up the command line to prepare the app for testing using Phonegap/Cordova's platform support. You can see the installed/available platforms on your machine by running the phonegap platforms ls command and adjust as needed.
Phonegap can prepare your application for use with one of these platforms. For example, by running phonegap add platform browser, your code will be migrated to a platforms/browser/www/ folder, and you can view your site by pointing a browser at that folder. As well, you can run phonegap add platform ios to prepare your site for XCode.
Phonegap can also run/launch your application in a web server, open up a new browser window, and point the browser at it using the phonegap run browser command. This can be useful for quickly testing your code, but each time you run the command it opens a new browser window ... which is a bit annoying if you then like to work in a private window to prevent caching, open up the developer tools, and toggle device screen sizes.
Instead, I used the phonegap prepare browser command to update my changes into the browser platform and simply refreshed my Chrome Private Browser Tab with Developer Tools and Device settings already open/configured.
Some of the Phonegap/Cordova plugins will not work in a browser, by the way. You'll see an error in the console, which I'll touch on later in the Troubleshooting section.
When you are ready to load the app onto a real or simulated iOS device, simply type phonegap prepare ios in the root of your Phonegap project. Next, you can open it in XCode one of two ways; either (1) open the XCode workspace file located in the platforms/ios folder, which ends in a '.xcworkspace' extension, or (2) run the open ./platforms/ios/PROJECT_NAME.xcworkspace/ command, replacing PROJECT_NAME with the name of your project. Once in XCode, you can select your Target as shown here in the iOS Cordova documentation. You will need to either assign a project team to your app and have XCode automatically manage signing or manually sign builds in order to run your app on a target simulator/device.
As mentioned earlier, using XCode you can test run your apps and plugins. It can be especially helpful to view the device console logs when using certain plugins. To see the device console log, simply go to Window > Devices, and then select the device you want to log. In the right part of the window, find the upward facing arrow '^' in the lower left corner. Click that, and the device log will render. You can find more on using the console log here.
When using XCode and a real device target, you can use Safari to perform web app debugging, such as inspect elements, see console.log messages, etc.
XCode also comes in handy when you need device screenshots to build your App Store profile. Using the iOS Simulator, you can use Command+s or File > Save Screen Shot to save your apps to the desktop (or elsewhere). At present, Apple requires you to upload 12.9” and 5.5” screen shots (with the new iPhone X 5.8" optional) using their (relatively new) Media Manager.
If you make changes to the /www source, simply run phonegap prepare ios again to update the iOS code, even while you have XCode open.
If you don't want to open and work in XCode, and only need the simulator, there is also an ios-sim npm package you can leverage that makes it easier to leverage the iOS Simulator without having to open XCode.
When ready, I would use Phonegap Build to create the iOS IPA package. Using the development or distribution provisioning profile, you can use the IPA package to either (1) test it on a physical iOS device, or (2) test it through TestFlight.
Simply use the Update Code button within the App you've created on Phongegap Build.

The iOS app should start building right away, unless your key is locked. You will routinely have to unlock your keys using the password you used when creating your Certificate. Below, I show a screenshot of the package building, and one with a locked key.


To unlock a key, simply click on the yellow lock and enter your password. Then click Rebuild to create a package with the last code you uploaded. When it's finished building, just download the IPA.

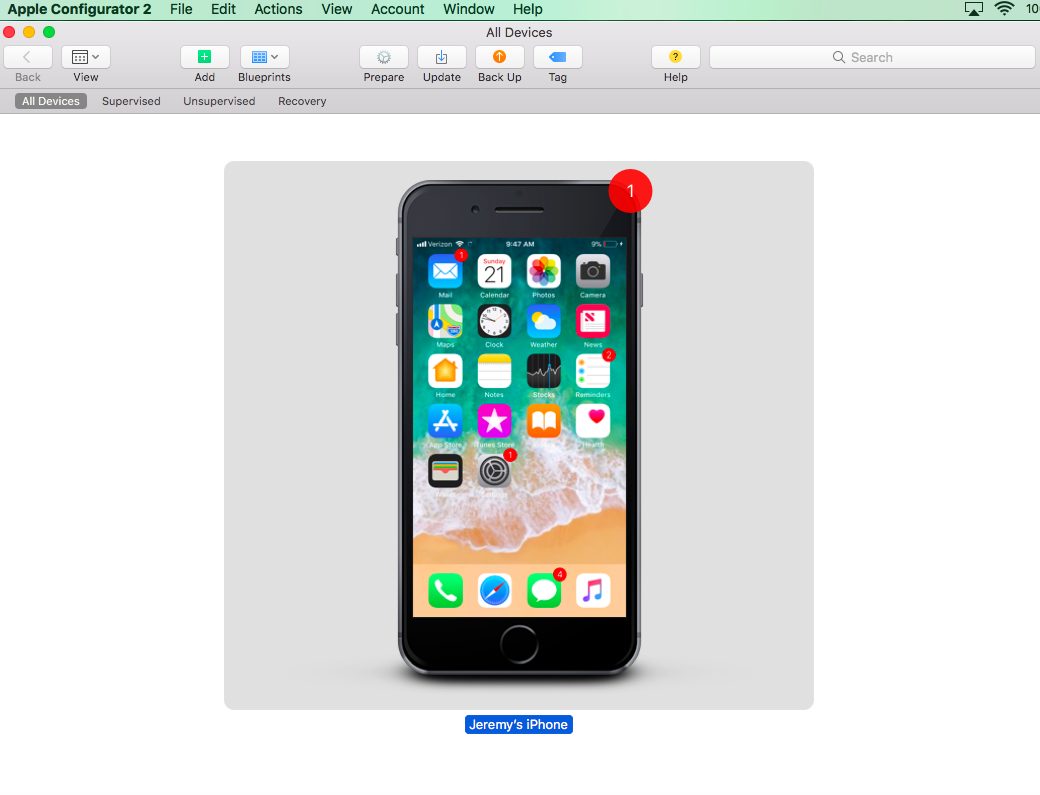
If you use the development provisioning profile, you can upload it to a real iOS device. This allows you to see how it will behave on the device without XCode instrumenting the app/phone. You can push the IPA package to the standalone device using either the iTunes application or the Configurator application to load it on your device. Simply download Configurator from the App Store, connect your device to your Apple Computer, unlock your device, and drag/drop the IPA package onto Configurator.
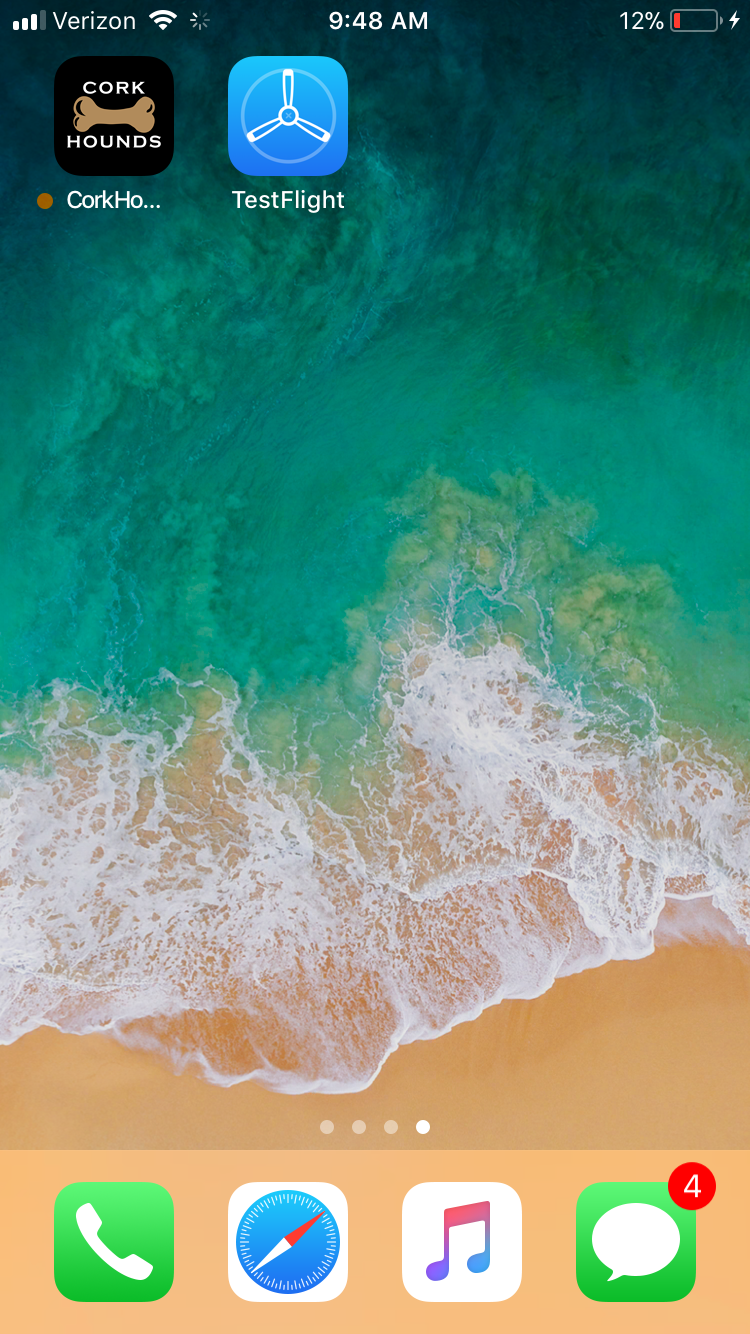
Once you've dropped the IPA package onto the device, it will upload the app, and you should see it appear on your iPhone.
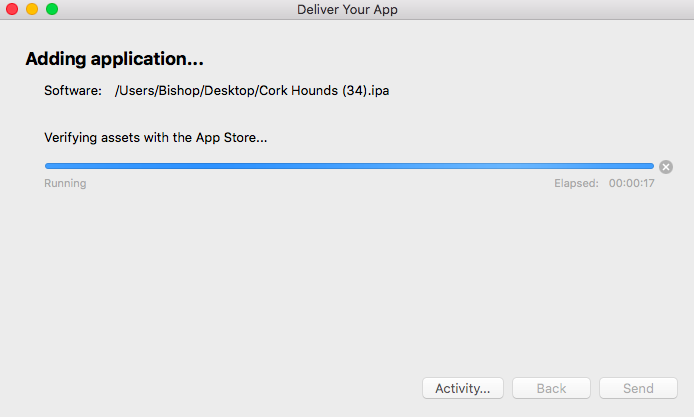
Alternatively, if you feel the app is ready to be tested by a wider audience, you can compile using your distribution profile to upload the IPA package to the App Store via the Application Loader to iTunesConnect, and access it via TestFlight. I started doing this once I felt like I had a Beta version that worked, and was worth other people's time to test out.
Uploading an app via TestFlight goes through a series of scans. This happens first on the initial delivery, and then again once its in iTunesConnect.
This is where basic package/plist related errors will occur. I touch on this a bit in Troubleshooting. You may get a message stating "The resulting API analysis file is too large. We were unable to validate your API usage prior to delivery. This is just an information message".
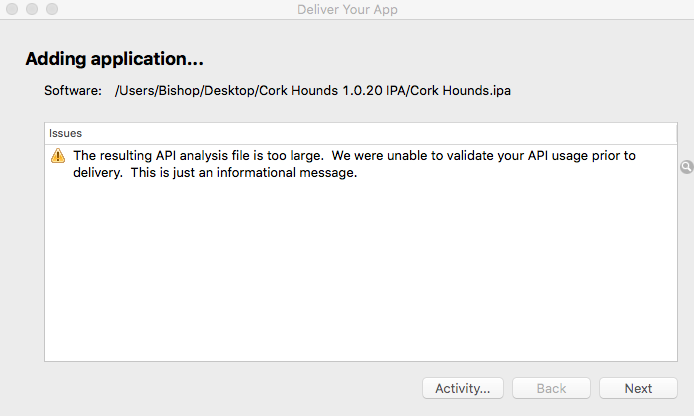
You can disregard this, and just hit next. You should get a 'Thank you' message next.
Once in iTunesConnect, if the app passes initial processing, you will receive a notification. Next, you will need to complete the Compliance Information questionnaire regarding Export Compliance.


You do this by clicking on the "Provide Export Compliance Information" link. Read this information carefully! Even using SSL/TLS to HTTPS links means you are using Cryptography, which is governed by the Bureau of Industry and Security in the U.S.
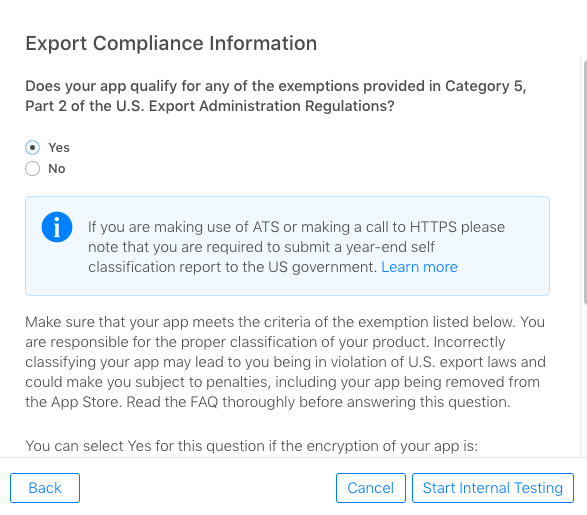
The good news here is that this process has become more streamlined. Click the 'Learn More' link to fully understand your obligation(s). If interested, I provide some further reading on this topic in the Observations section below.
Once that's complete, you (and any other iTunesConnect users on your account) are able to use the app via TestFlight right away. To make it available to your external test users, you need to put it through a Beta App Review. You'll see that the App is ready for this review in iTunesConnect:

The Beta App Review is the closest thing to an actual App Submission Review, so its good to get this feedback. Every version of the app that you want to make available to non-iTunesConnect users needs to go through a Beta App Review. On average, these took one to two days for me.
To initiate the Beta App Review, create a Test Group, and supply some names/emails. Once you finish setting up this group, your testers will receive an email invite to download the TestFlight app. Next, click on the version number link of the app you want to submit via the link from the iOS Builds menu:
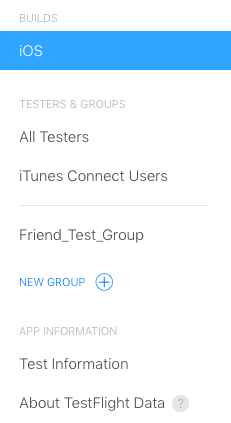
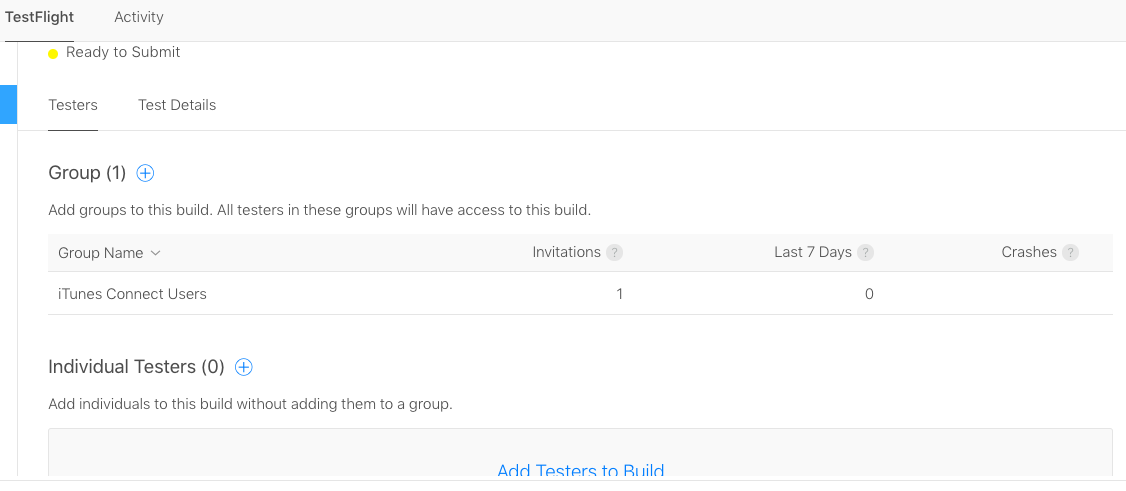
A new page opens (displayed below). You Can add your test group by clicking on the "+" next to Group(1), or add individual testers at the bottom:
Next you'll be prompted to provide instructions to your Testers. You can also decide whether to release the Test App to your users immediately upon approval, or if you wish to release it manually. If you decide to release it automatically, or when you release it manually, your testers will receive an email (and notification if they installed the TestFlight app) that your new version is available.
The TestFlight program allows all your testers to submit feedback, and for you to collect crash report data. Most importantly, it allows you to test it in the wild (along with your backend) at a greater scale.
Our app is relatively simple; I went through roughly 18 versions via iTunesConnect, releasing approx 5 versions to our testers via TestFlight.
Troubleshooting
I ran into a few issues/errors throughout this exercise.
Shouldn't come as any surprise that these mainly surfaced during testing or occurred in Application Loader / iTunesConnect. I regret not recording all the issues I encountered; but here are several tips/examples.
Development/Test
1. When testing with the cordova browser platform, you may see missing command errors or 'Error: exec proxy not found for

This means you will need to test it in the iOS simulator or on a physical device.
2. I ran into an issue displaying certain fonts (mainly Ion Icons). The issue manifested by switching fonts in the bottom Search menu. All icons would get re-drawn to the same icon randomly. I think I solved this problem; it seemed related to the Font Face (@font-face) declaration in the CSS, where each font file included a version (?v=x.x.x) for caching purposes. I removed those versions.
Application Loader / iTunesConnect
1. I started this endeavor using cli-7.0.1 because that was the latest supported CLI version in Phonegap Build when I began. Using cli-7.0.1, I received quite a few errors during the IPA package analysis in the Application Loader. One of these errors is shown below, regarding a missing App Store icon at 1024x1024 pixels.
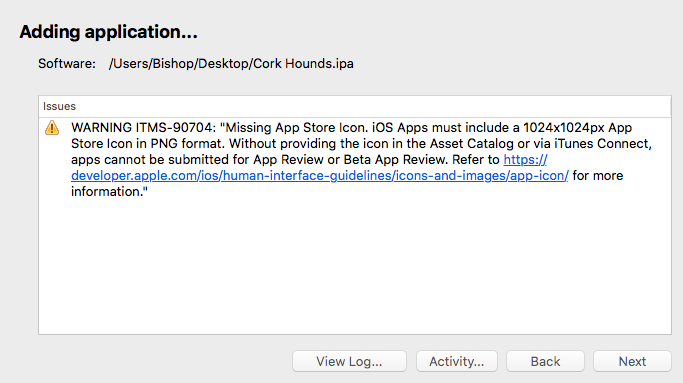
To resolve this specific error, I did two things: (1) added the icon-1024.png to the res/ios folder with at 1024x1024 as a 24 bit PNG, and (2) upgraded to cli-7.1.0. This finally resolved that issue.
<icon height="1024" src="res/ios/icon-1024.png" width="1024" />
Other, similar missing icon errors of all kinds occurred while using the cli-7.0.1 Build. The primary issue was that this version of the build seems to require the general icon.png in the res folder:
<icon src="res/icon.png" />
To write this blog, I tried to recreate some of these errors using the cli-7.1.0, and could not. Based on my experience, if you follow my guidance here, and use the latest cli (cli-7.1.0 at the time of this writing), you shouldn't have any issues with icons.
2. If you use the iOS sensors (like geolocation, camera, etc) or access personal information, you will need to get the user's permission, and provide a description of how this data will be used. I demonstrated one such usecase related to geolocation in the config.xml earlier:
  <edit-config target="NSLocationWhenInUseUsageDescription" file="*-Info.plist" mode="merge">
    <string>YOUR DESCRIPTION</string>
  </edit-config>
This description will appear on the prompt that requests permission to use the device's geolocation. If you do not add these additional usage descriptions, you will likely fail the Beta App Review and/or Submission Review. Our app was rejected once due to a related error w/ the camera plugin. Since we aren't using that, I just pulled it out of the config.xml.
3. Be sure to iterate your config.xml version number each time you submit, or else you will receive an error that the version already exists in iTunesConnect.
Update July 2018: If you receive an error message when trying to sign-in to Application Loader that reads: "To use this application, you must first sign in to iTunes Connect and sign the relevant contracts.", check out this stackoverflow question/answer.
I may add others to this section in the future.
Observations
Here are some simple observations having successfully released our mobile app to the App Store for general use. I'll keep these confined to just the frontend iOS client, and not the backend (which is equally important, but which I'll address in a later blog).
For starters, I used Javascript, HTML 5, and CSS3. My app used JQuery heavily, which operates on the physical document object model (DOM). There is a slight performance hit for this, which slightly impacts the user experience. As an aside, I've started learning ReactJS and will likely move toward React Native in late 2018.
As part of this process, you will need to create a Privacy Statement and Licensing Agreement (although you can use Apple's generic App Store license if you choose). When you become an Apple Developer, within the Agreement you sign, Apple provides the minimum requirements your agreement(s) must address. You can find some of these broader Developer agreements here for later review. For clarity, Apple has also provided a separate page with the minimum requirements for your licensing Terms/Conditions here. Another helpful site provided by Apple gives general tips/considerations for building mobile applications.
On the topic of cryptography, I found a good blog post written by Cossack Labs on export regulations associated with Cryptography. It is important to know/understand your obligation to comply with export restrictions, so I recommend you take some time to read up on this.
I wish I could say that developing a mobile application was straight forward, with low overhead, and that the errors were easy to figure out. That is unfortunately not the case. End-to-end, working only part time on weekends/nights, this process took me more than half a year to complete. Apple and Adobe could do a lot more to provide relevant pro-tips and a healthy troubleshooting/debugging guide.
If you get any other errors, it can be helpful to unzip the IPA package, check the info.plist, and ensure all your files are added.
My best advice is to not give up; be persistent and you will prevail!
Next Steps
In the near future, I'll write a separate blog on the backend of the mobile application, which I started on the middle of last year (2017). I decided to start laying out the server-side infrastructure for building a mobile application using API Gateway, Lambda and DynamoDB. The work I describe in my DynamoDB Geospatial blog was actually part of this endeavor.
As well, I will soon start work on porting this application to Android OS. I may write a blog on that effort as well.
Lastly, I have started to play around with embedded Advertising. The Cork Hounds mobile application uses Facebook Audience Network. I do not want to degrade the Cork Hounds user experience with Ads. It would be nice though to cover the expenses associated with our passion project. As such, I want to make sure it is tastefully incorporated. I may write a blog on my experiences with the various Advertising Networks.